Use Case #1: As a TPP, I use Token.io's licence, bank selection, and consent pages
Tip: If this use case does not apply to you and you wish avoid spending valuable time on something you won't use, please go back and select the use case that does apply to you. Remember, you can always return here later should your use case requirements change.
Overview
For some banks, the business/merchant must confirm payment initiation after the PSU has authenticated with their bank. This is called 2-step payment and is reflected in the following diagram.

Other banks automatically initiate payment after the PSU is authenticated by the bank. This is called 1-step payment and is reflected in the next diagram.
These respective flows can be enumerated as follows.
2-Step Payment Flow
In concert with the diagram above, the steps comprise:
- The customer initiates the payment on your business/merchant website.
- The business/merchant creates and stores the token request, specifying the amount, currency, debtor name, and (optionally) country.
- Token.io returns the request_id.
- The business/merchant redirects the customer to the constructed token request URL. This takes the user to the Token.io web app.
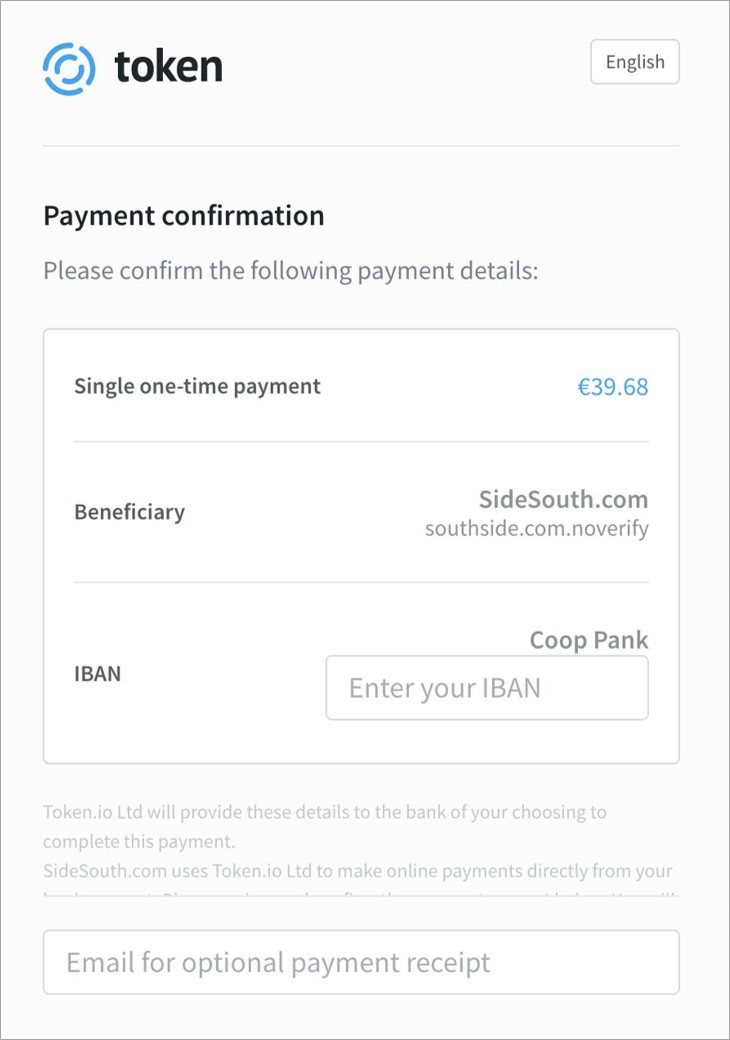
If the country is specified in the token request, Token.io presents the customer with the Token.io web app's bank selection page, filtered by country. From the list displayed, the customer must select the bank they want to use to make the payment. Should the source account number be required by the selected bank, you can capture the source account number from the customer in your UI. Token.io will display it on the payment confirmation page (pictured below) of the Token.io web app. If you did not capture the source account number, Token.io will present the customer with an empty text box on the payment confirmation page, where they must enter their source account number before continuing.
- Customer is now redirected to bank URL to authenticate and confirm payment.
- Token.io returns token_id in a callback to business/merchant.
- Business/merchant redeems the token.
-
Token.io sends the transfer_id to business/merchant.
Note: At this point, the payment is complete.
- Business/merchant calls getTransfer to determine the status of the transfer.
- Token.io returns the updated transfer status.
- The business/merchant displays the transfer status to the customer.
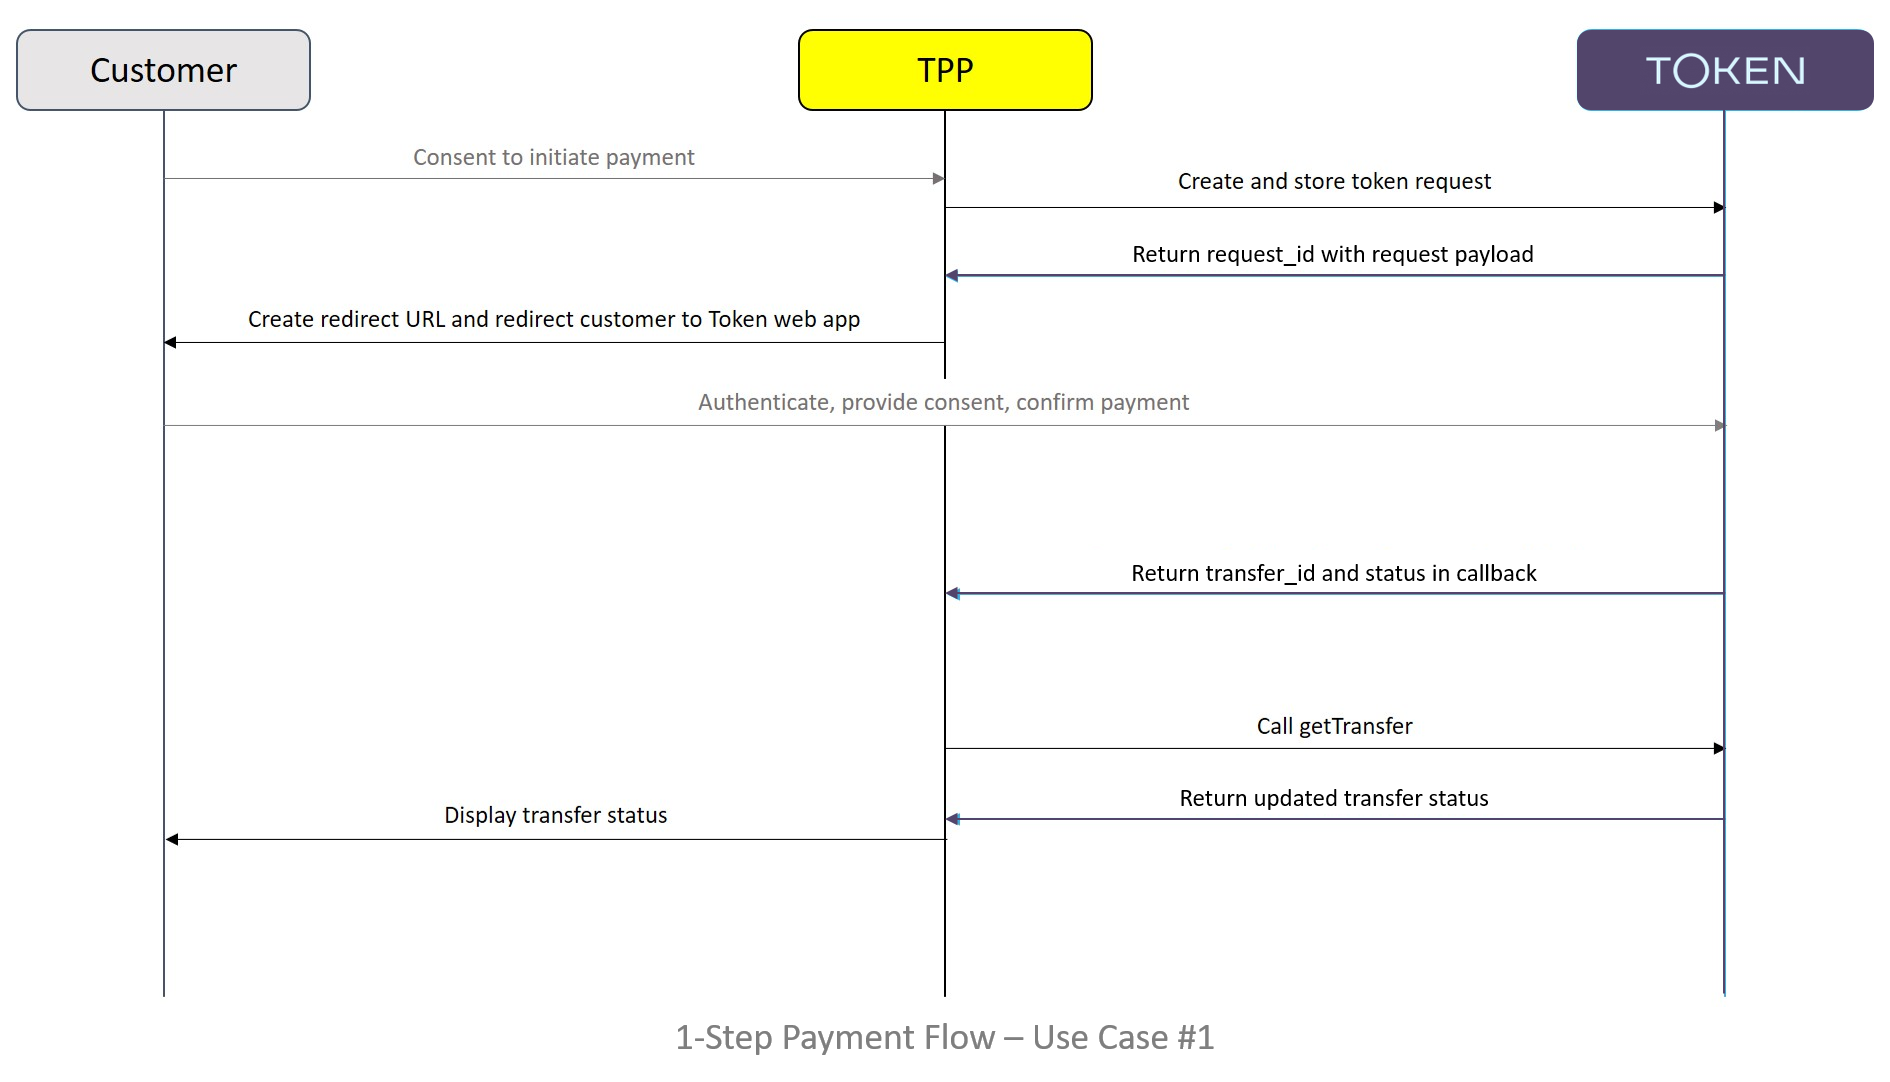
1-Step Payment Flow
In concert with the diagram above, the steps for this flow comprise:
- The customer initiates the payment on the business/merchant website.
- The business/merchant creates and stores the token request, specifying the amount, currency, debtor name and, optionally, country.
- Token.io returns the request_id.
- The business/merchant redirects the customer to the constructed token request URL. This takes the user to the Token.io web app.
If the country is specified in the token request, Token.io presents the PSU with the Token.io web app's bank selection page, filtered by country. From the list displayed, the PSU must select the bank they want to use to make the payment. Should the source account number be required by the selected bank, you can capture the source account number from the PSU in your UI. Token.io will display it on the payment confirmation page (pictured below) of the Token.io web app. If you did not capture the source account number, Token.io will present the PSU with an empty text box on the payment confirmation page where they must enter their source account number before continuing.
- Customer is now redirected to bank URL to authenticate and confirm payment.
-
Token.io sends the transfer_id and transfer status in a callback to the business/merchant.
Note: The payment is now complete.
- Business/merchant calls getTransfer to determine the status of the transfer.
- Token.io returns an updated transfer status.
- The business/merchant displays the transfer status to the customer.