Alternative to webhooks
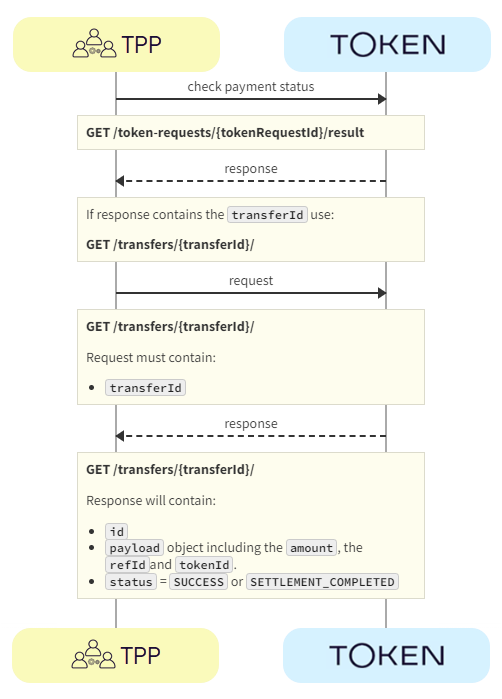
If you're not using webhooks, you'll need to use GET /token-requests/{tokenRequestId}/result to obtain the transferId in order to call the GET /transfers/{transferId}.
-
TPP -> Token.io - On receiving the callback from Token.io the TPP first checks the token request status using the
GET /token-requests/{tokenRequestId}/resultcall. -
Token.io -> TPP - Token.io responds to the
GET /token-requests/{tokenRequestId}/resultcall. If the token-request status isPROCESSED, the response should contain thetransferId. The TPP will keep calling theGET /token-requests/{tokenRequestId}/resultendpoint until thestatushas moved fromPENDINGtoPROCESSEDand thetransferIdhas been received.A
REJECTEDtoken-request status means that the request has been rejected by either Token.io or the bank, and the user was not asked to authorize the payment. -
TPP -> Token.io - Once the response to the
GET /token-requests/{tokenRequestId}/resultcall contains thetransferId, the TPP uses theGET /transfers/{transferId}request.
-
Token.io -> TPP - Token.io confirms the payment status in the
GET /transfers/{transferId}response.
If the status is non-final, e.g., PROCESSING, the TPP should use a polling call (GET /transfers/{transferId}) every 15 mins.
Refer to the Token.io API Reference for additional details.
Restricted beneficiary accounts (optional)
Transfer destinations are typically TPP-controlled accounts administered for appropriate funds distribution according to the governing regulations where the TPP is licensed. You can create a list of beneficiary accounts to restrict your transfer destinations. This step is optional.
The transfer destinations designated in your PIS calls can be manually added to the dashboard.
Please contact Support to use this feature.
In all cases, for proper payment request initiation, execution, and funds transfer to the correct beneficiary account(s), take the following steps:
-
Sign in to the Dashboard and select Beneficiary under Settings.
The List of Accounts is displayed; initially, your list will be empty until you make some entries. Here you can Add, Modify and Delete accounts. -
Add an account by clicking the Add button, then enter the required information: Account Name, Currency, Country, Account Type, and IBAN. BIC is optional.
-
Click Save to add the information.
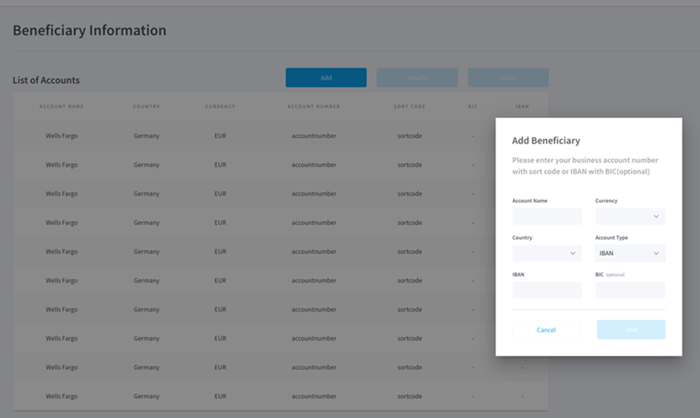
Once saved, beneficiary accounts in the list are available as transfer destinations for the payments you initiate by specifying the Account Number/IBAN and optional BIC, as appropriate.
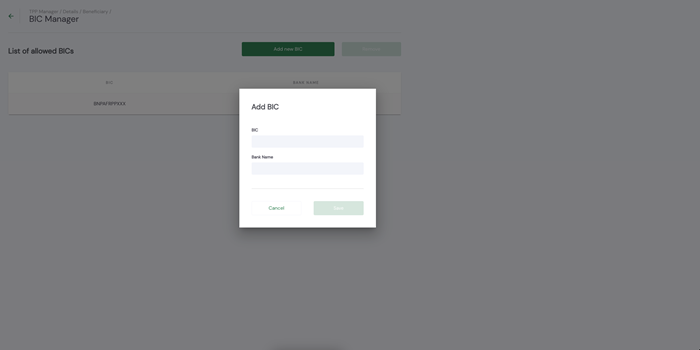
The BIC manager can be used to further control what can be added to the list of restricted beneficiaries.
-
On the List of Accounts page, click the BIC Manager button.
-
On the BIC Manager page, click the Add new BIC button, then enter the required information: BIC, Bank Name.
-
Click Save to add the information.
If the BIC manager list is empty, any IBAN can be added to the list of allowed beneficiaries. If, however, a BIC has been added via the BIC manager, then only IBANs belonging to that BIC can be added to the list of allowed beneficiaries.
The BIC and IBAN are validated upon saving to ensure only those that are valid can be saved.
Entering a BIC in the BIC manager without adding any IBANs to the list of allowed IBANs, does not have an impact on transactions. The beneficiary on a given transaction is only validated if there is at least one entry on the allowed beneficiaries list, the BIC manager only controls what can be added to that list.