Certificate Management
With these settings you add and maintain your eIDAS-qualified SSL certificates for secure communications with connected banks via the Token Cloud. Your organization needs to install SSL certificates onto its web server to initiate a secure session with browsers. Then, when connection is established, all web traffic between the web server and the web browser is secured. Hence, when a certificate is successfully installed on your server, the application protocol HTTP changes to HTTPS, where the ‘S’ stands for ‘secure’. Obtain your certificates from a trusted CA. If you are supporting PIS, you will need one certificate for payments and a second certificate for refunds/reversing payments with banks that support the refund feature.
Typically, an applicant for a digital certificate will generate a key pair consisting of a private key and a public key, along with a certificate signing request (CSR). Key pair and CSR generation are usually done on the server or workstation where the certificate will be installed, and the type of information included in the CSR varies depending on the validation level and intended use of the certificate. Unlike the public key, the applicant’s private key is kept secure and should never be shown to the CA (or anyone else).
After generating the CSR, the applicant sends it to a CA, who independently verifies that the information it contains is correct and, if so, digitally signs the certificate with an issuing private key and sends it to the applicant.
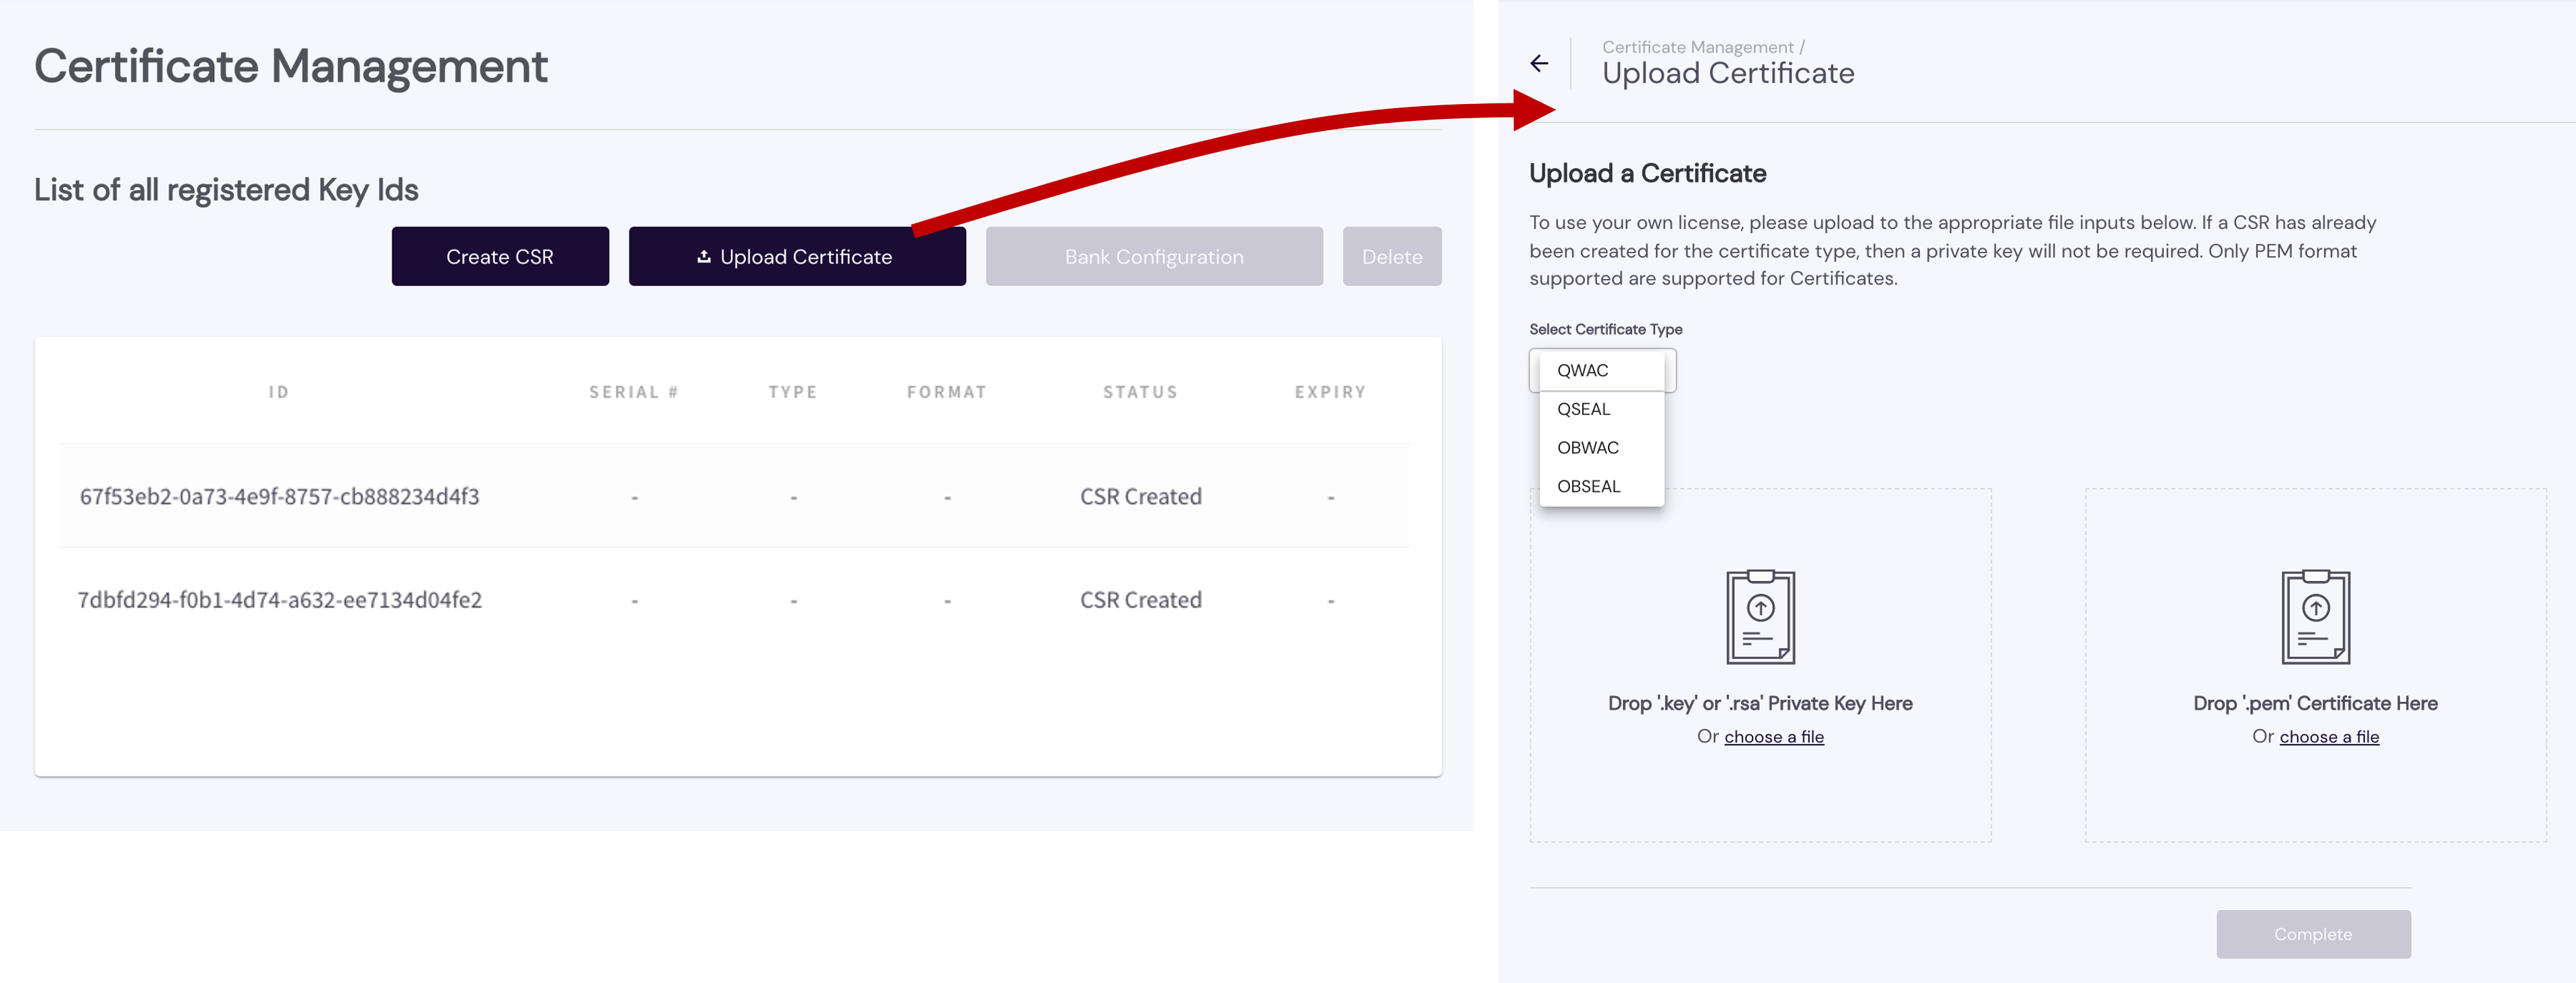

With the dashboard's Certificate Management setting you can create a new CSR or upload an existing certificate. When you add a certificate, it appears in your List of all registered Certificates, which indicates its ID, SERIAL #, TYPE, FORMAT, STATUS, and EXPIRY.
Certificates that follow the X.509 standard contain a data section and a signature section. The data section includes:
- Distinguished Name (DN) of the entity that owns the public key
- DN of the entity that issued the certificate
- Period of time during which the certificate is valid
- The public key itself (e.g., 3048 0241 00C9 18FA CF8D EB2D EFD5 FD37 89B9 E069 EA97 FC20 5E35 F577 EE31 C4FB C6E4 4811 7D86 BC8F BAFA 362F 922B F01B 2F40 C744 2654 C0DD 2881 D673 CA2B 4003 C266 E2CD CB02 0301 0001).
See the following topics under Managing Certificates for additional guidance on obtaining and uploading certificates:
